Make Your Own Ocean Themed Place Mats
To make these 6 mix and match style placemats with an oceanic theme, I picked out 1/2 yard of 6 different coordinating fabrics. You could make them all the same if you like but I decided to do some variations using some of the wonderful Batik fabric that is out there and coordinating it with some other cotton paisleys I liked. You will need about 2 yards of batting for this project. I used Dritz adhesive basting spray and coordinating thread for this project. You are quilting each piece as you go along so you want to make sure that your bobbin thread coordinates well with your backing fabric. I also make sure to have a good pair of sharp embroidery scissors to clip threads and I am using a very Sharp Microtex style quilting needle in the machine.
The way I cut the fabric with a rotary cutter, and clear quilting ruler on a mat was this:
Backing Fabric: 6 panels 15"X 21" iron 1/2 inch fold all around each of the background panels
Focal Center Fabric: 6 panels 7" x 13"
Small Frame Strips: 12 strips that are 1"x 15" ironed 1/4 inch up on one side of each strip and 12 strips that are 1"x 8" ironed up 1/4 inch up on one side of each strip
Outer Border Strips: 12 strips that are 3" x 13" and 12 strips that are 3" x 18.5". On each of the 3" x 18.5" strips iron up one side 1/4"
Batting: 6 panels that are 13" x 19"
My Assembly Line
 |
| Iron up the edges of each backing 1/2 inch |
 |
| Spray Your Backing with Dritz Adhesive Basting Spray (I didn't use much) |
 |
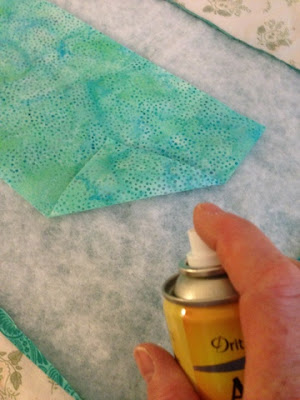
| Center the Focal Center Piece. I measure approximately 3.5 inches on each side and eyeball it so it looks centered. |
 |
| Spray a little Adhesive Basting Spray to hold center focal piece in place. I just lift up the edges and give a small spritz |
 |
| Iron the 1" side strips over 1/4 inch and do the shorter side strips first. Position them with Pins as shown above |
Sew a straight stitch 1/4 inch in along the edge of the focal fabric. If you sew over pins, sew slowing over them so as not to break a needle.
Once you have sewed the side strip to the focal fabric, lay the 3"x13" outer border fabric next to the 1" inch sewn folded strip. it will fit right between that and the 1/2 inch ironed up border of the backing fabric. Trim to fit snugly.
Fold the inner strip over
and pin as shown above on both the right and left sides of the placemat.
 |
| Now position the longer 3" X 18.5 outer border fabric as shown above with the 1/4 inch folded and ironed section facing towards the focal fabric on each side |
close up of folded edge next to focal fabric
position the 1" strip so that the rough edge is against the fold and the folder edge will be folded over the focal fabric. This is opposite of what you did on the right and left shorter sides of the focal fabric.
 |
| Fold over edges onto focal fabric and sew down beginning at the folder outer edge seam of the outer border |
 |
| pin down borders |
 |
| Sew on Folded over seam as shown above and then continue on to 1" border strip |
 |
| To finish fold over 1/2 inch ironed fold on right and left shorter sides 1st and pin as shown above and below |
After pinning the sides, fold down the longer top
Corners will look like this. There may be better ways of finishing off these corners but it works well enough for me this way.
After you have pinned all around the placemat, carefully stitch a straight stitch all the way around, snip off all the loose ends and you are done! Congrats!
The back of the placemat will look like this and be just as pretty as the front. You can use this side at your table as well!!
Finished Placemats. You might want to do additional free motion quilting in the centers and that is something I am considering doing but you can use these just like this for your table and you are good to go!
 |
| My finished 6 placemats! They came out really beautifully and I want to make more and even try some other themes and colors.
Happy Sewing,
Melissa
|


No comments:
Post a Comment